
Nowadays, most frontend web developers build their UI with well-known libraries and frameworks such as React, Angular, Vue, and so on. Maybe many developers have almost forgotten how to dynamically create HTML elements by accessing the Document Object Model (DOM). In fact, almost all these cool libraries abstract the DOM and provide their own model to produce HTML elements. Some even virtualize the DOM to optimize access.
Why then should a modern frontend web developer keep the DOM in mind? After all, it sounds like low-level stuff that UI libraries handle efficiently.
That’s certainly how it looks, and for the most part, how it is, but the DOM always remains present. Any UI model eventually maps your code to the DOM, retaining its congenital defects in the process.
The problem with the DOM
Most UI libraries have made us accustomed to thinking of the UI as a puzzle of components. This architecture is really awesome and promotes reuse, one of the most avidly-pursued principles of software development. On the other hand, the DOM has a major flaw that hinders composition and reuse: it is globally accessible.
It doesn’t matter where your UI element comes from – React, Angular, plain JavaScript… When your element is appended to the DOM, it can be accessed from any JavaScript code or CSS rules, and its internal structure can be changed.
The DOM is like a global variable. And all we know how bad global variables are.
As a result, when you add your UI component to the DOM, the UI may lose its alleged reusability due to the DOM’s lack of encapsulation.
Let’s explore this point with an example.
Say you have created an awesome banner to invite your JavaScript community to your next great meetup. You want to distribute this banner to other websites so that they can all spread the word. You can build this banner in many ways, with pure HTML or using the UI library you prefer. It doesn’t really matter – regardless of how you build, the output will be a few elements on the DOM.
For our purposes here, assume that this is the JavaScript code that creates your banner:
function createBanner(elementId) {
 const banner = document.getElementById(elementId);
 banner.innerHTML = `
<style>
#box {
-webkit-box-shadow: 5px 5px 15px 5px #000000;
box-shadow: 5px 5px 15px 5px #000000;
font-family: Verdana, Geneva, sans-serif;
padding: 10px;
text-align: center;
width: 80%;
}
h3 {
font-size: 25px;
color: #5F36FF;
}
#description {
font-weight: bold;
font-size: 18px;
color: #6B6B6B;
}
#finalMessage {
font-weight: bold;
color: #6B2E63;
text-decoration: underline solid rgb(68, 68, 68);
}
</style>
<div id="box">
<h3>Join our awesome JavaScript meetup</h3>
<p id="description">You will learn the latest amazing way to forget JavaScript.<p>
<p id="finalMessage">Don't miss it!</p>
</div>
 `;
}
We’ve used plain JavaScript here: a simple function that takes the identifier of an element in the DOM and attaches some markup to it. If this code is stored in a file named banner.js, you can use it within an HTML page in the following way:
<!DOCTYPE html>
<html lang="en">
<head>
  <meta charset="UTF-8">
  <script src="banner.js"></script>
  <script>
    window.onload = function() {
      createBanner("banner")
    };
  </script>
</head>
<body>
  <div id="banner"></div>
</body>
</html>
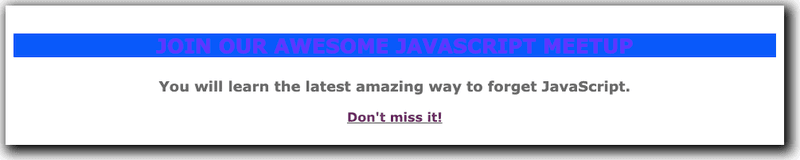
This page will be rendered as shown in the following image:

Now, say that one of your ‘friend’ websites uses a CSS rule like the following:
h3 {
  text-transform: uppercase;
  background: #0A59FA;
}
As a result of applying this rule, your banner will look like this:
Not so good – this is not how you wanted your banner to look.
Even worse, imagine that somewhere in one of those other websites there is a JavaScript code like this:
document.getElementById("description").innerText = "I don't like JavaScript!";
Your banner will now look like this:

Eventually, you will decide that your banner is not safe. Its inner structure can be manipulated like any other element in the DOM.
How can you protect your work from accidental or intentional changes from the external environment? How can you guarantee the encapsulation of your work?
The Shadow DOM
Traditionally, the DOM encapsulation problem has been tackled by using iframes. Put all the code for your banner into an iframe and it is protected. That solution solves one problem, but it introduces others. In fact, there is a simple and elegant solution for the encapsulation problem, and its name is Shadow DOM. It is a set of standard APIs that enable the encapsulation of a portion of the DOM inside the DOM of an HTML page. This allows you to create a sort of private DOM for an HTML element. In other words, it enables a local DOM in contrast with the global DOM, just like global and local variables. The trick is very simple. Look at this snippet of code:
function createBanner(elementId) {
  const banner = document.getElementById(elementId);

  banner.attachShadow({mode: "open"});

  banner.shadowRoot.innerHTML = `
    <style>
      // The same stuff as before...
    </div>
  `;
}
We just invoked the attachShadow() method of the element to attach the Shadow DOM. This method is available for most HTML elements. It attaches a node that represents the root of the local DOM to the banner element. This root node can be accessed through the shadowRoot property. The content that was previously directly appended to the banner element is now appended to the shadowRoot property.
Open and closed Shadow DOM
As you’ve seen, a very little change to your code makes your banner impenetrable. Well actually, not quite.
You noticed that we passed a parameter to the attachShadow() method.
banner.attachShadow({mode: "open"});
This is a literal object with the mode property set to the open value. This object allows you to specify the creation mode of your Shadow DOM and it is mandatory. In the example above, we asked for an open Shadow DOM. This means that the elements that build up our banner will be protected against accidental interference from CSS rules or DOM manipulation, but they remain accessible from the outside world. In fact, you can access the elements through the shadowRoot property, as shown below:
const bannerRoot = document.getElementById("banner").shadowRoot;
bannerRoot.getElementById("description")
  .innerText = "I don't like JavaScript!";
So, the internal parts of your banner are still accessible, but it has to be done intentionally. By attaching the Shadow DOM with the open mode you chose for this to be possible. If on the other hand you don’t want access to be possible, if you want the internal workings of your banner to be invisible to the rest of the world, attach a Shadow DOM with the closed mode:
banner.attachShadow({mode: "closed"});
Now, your banner will be impregnable!
Conclusion
As we saw inthis article, the DOM most developers know is not the best structure for hosting a composable UI. Its open accessibility exposes your UI elements to possible undesirable conflicts. This factor clashes with the principle of composability and reusability we all want for our UI elements. We have explored an example of such possible conflict, but we have also discovered that a simple and standard solution is available. The lack of encapsulation of the classic DOM can be overcome by using the Shadow DOM. A few JavaScript statements can save your work from external interference and make your UI elements really reusable.