
In a previous article, we described how to create an Azure Web App for your web application from scratch. This article explains how to add an Azure SQL database to an app and manage it through the Azure Portal. To complete these steps, you will need an active Microsoft Azure Subscription.
What is Azure SQL Database
Azure SQL is included in the Microsoft Azure Platform-as-a-Service (PaaS) offer, which lets you create SQL Server instances and databases. It is highly scalable and can be used to help manage massive workloads, if needed. This service is also compatible with SQL Server on-premises instances. Some appealing features are:
- Instance management through the Azure portal;
- Simple scaling model;
- Straightforward security configuration;
- Simple migration from an on-premises environment to a cloud instance;
- Auto-tuning thanks to the built-in machine learning engine;
Using on-premises instances can be challenging: firstly, you need to have a virtual machine or a physical server with a well-defined hardware and software configuration. Even if these options can be tweaked for a virtual machine, you cannot achieve the flexibility of a cloud environment. Also, security aspects have to be addressed, such as operating system updates and networking configuration. Other concerns include high availability and data recovery, not always an easy task to maintain. Azure SQL offers many advantages that on-premises cases generally do not – Microsoft manages the hardware and the operating system patches directly. In terms of scaling, you can quickly increase the compute size on your instance if more power is needed. Furthermore, Azure SQL provides a built-in firewall that helps manage ingoing connections through a configuration page, on which you can identify the IP addresses authorized to access the database.
Create an Azure SQL Database
Once logged into the Azure Portal using your account, click on the ‘Create a Resource’ button in the side menu to open the ‘New’ section.
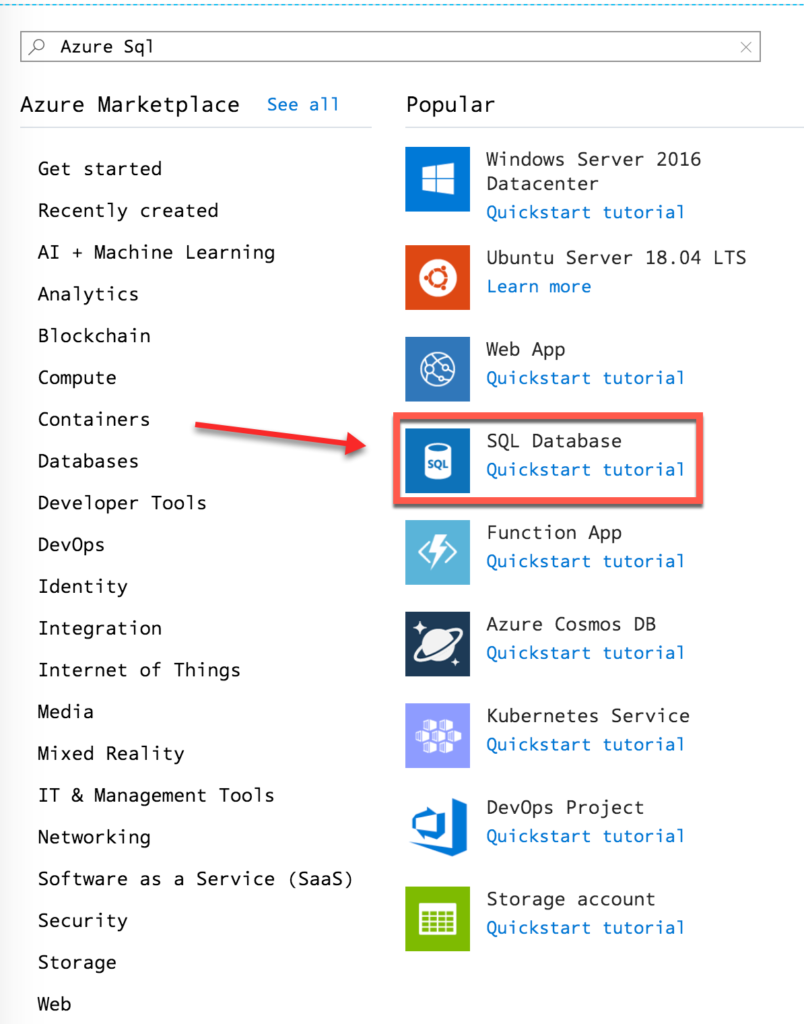
Clicking on the SQL Database link will show the Azure SQL creation wizard.
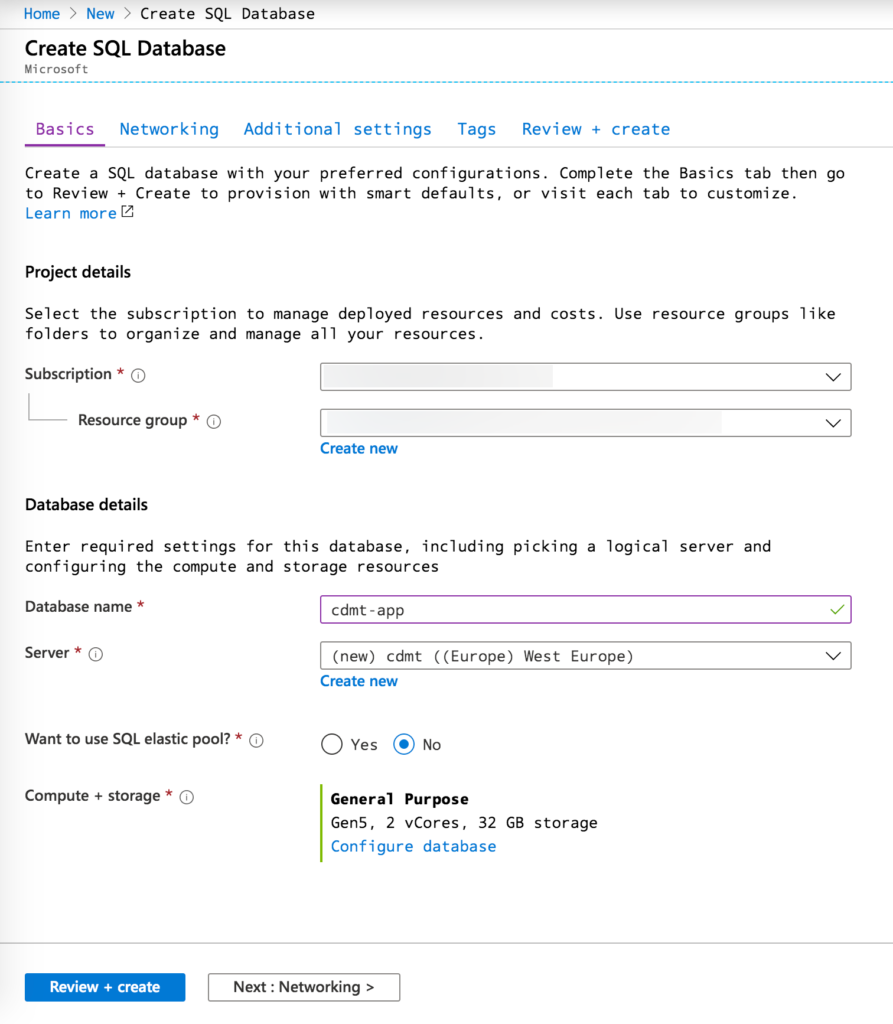
In this section, select a subscription, a resource group (if already available), and a database name. Next, click on the ‘Create new’ link in the Server field. A popup will open, in which you’ll need to set the server instance configuration.

Elastic pools can be ignored for now. This feature allows sharing instance resources among multiple databases inside the same pool.
Pricing Model
Finally, click on the ‘Compute + Storage’ setting. Microsoft Azure offers two different purchasing models: the Database transaction unit (DTU)-based purchasing model (DTU) and the Virtual core (vCore)-based purchasing model. The main difference is that while the first bundles compute and storage resources into a set of predefined configurations, the second offers more flexibility by selecting resources in a more granular way. vCores are actual virtual cores, and this purchasing model lets you scale compute or memory resources independently. The purchasing model used in this article is DTU-based. Click on the ‘Configure Database‘ link and choose the ‘Basic, Standard, or Premium’ section.

In the Basic configuration, set the instance parameters as in the following image:

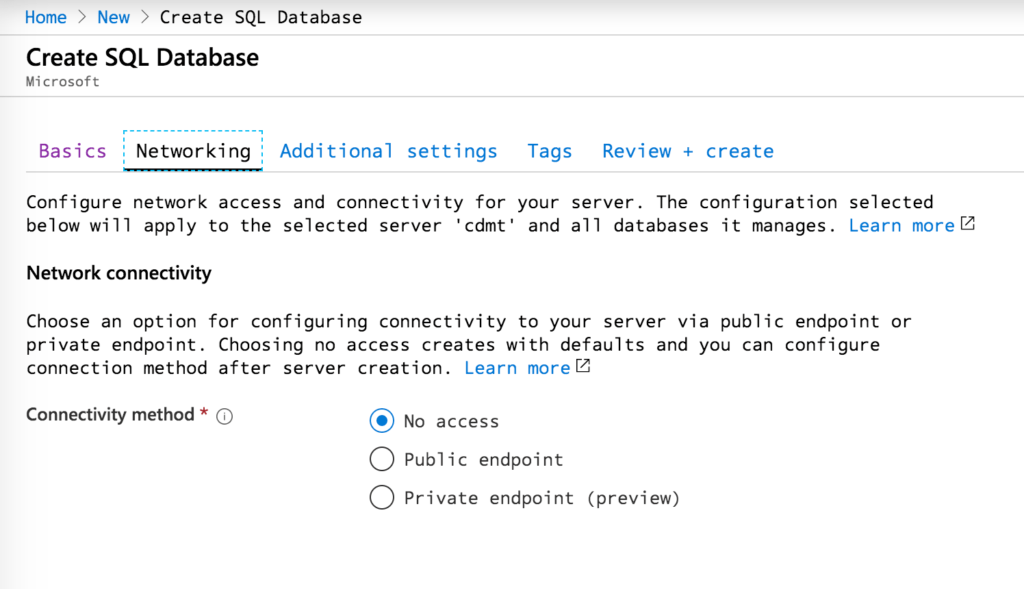
The page shows an estimated monthly cost. Save the configuration and proceed to the Networking tab, confirming default settings.
In the ‘Additional Settings’ tab, it is possible to define the database collation: this parameter establishes the comparison rules used when ordering or comparing data (i.e., case sensitive or case insensitive).
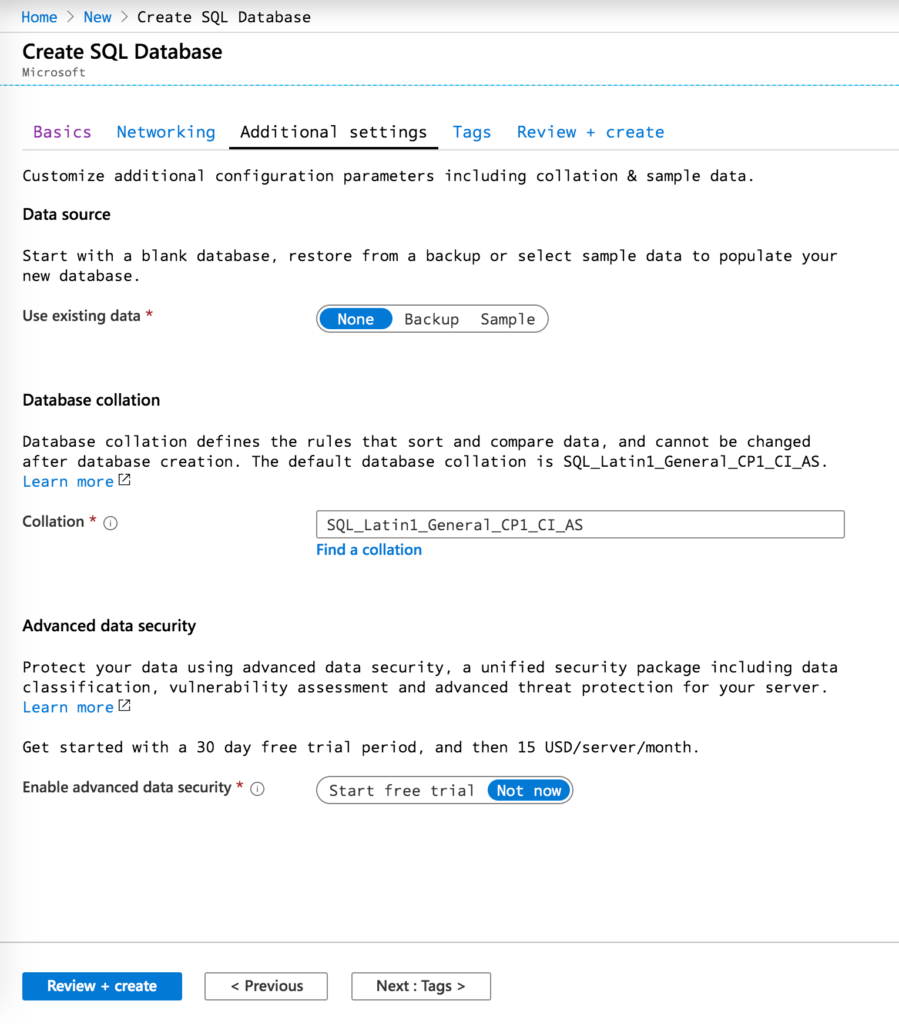
Click on the ‘Review + Create’ button to start the provisioning of the database. Once completed, you can access the resource page.


It is important to know that when the SQL Database is created, a new database instance is created, too: this is a logical container that can manage multiple databases, accounts, firewall rules, and so on.
Connect to Azure SQL database
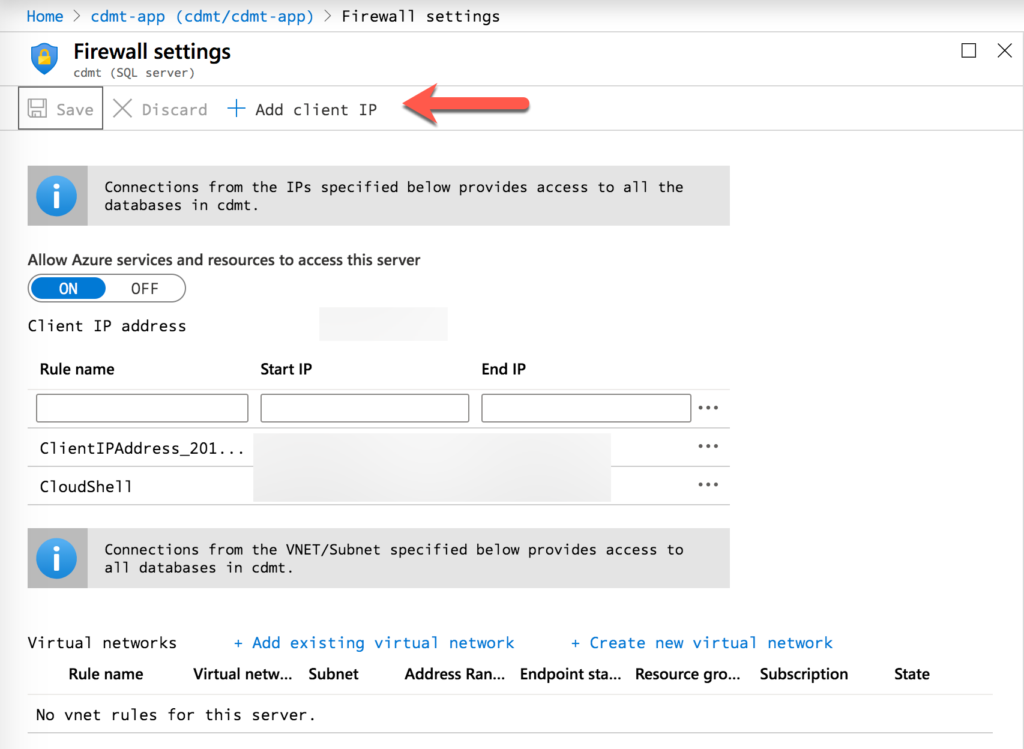
Before connecting to the database, you need to configure the firewall to allow incoming connections. By clicking on the ‘Set server firewall’ button on the database page, you can add a client IP or enable Azure Resources to access the DB, as in the following image:
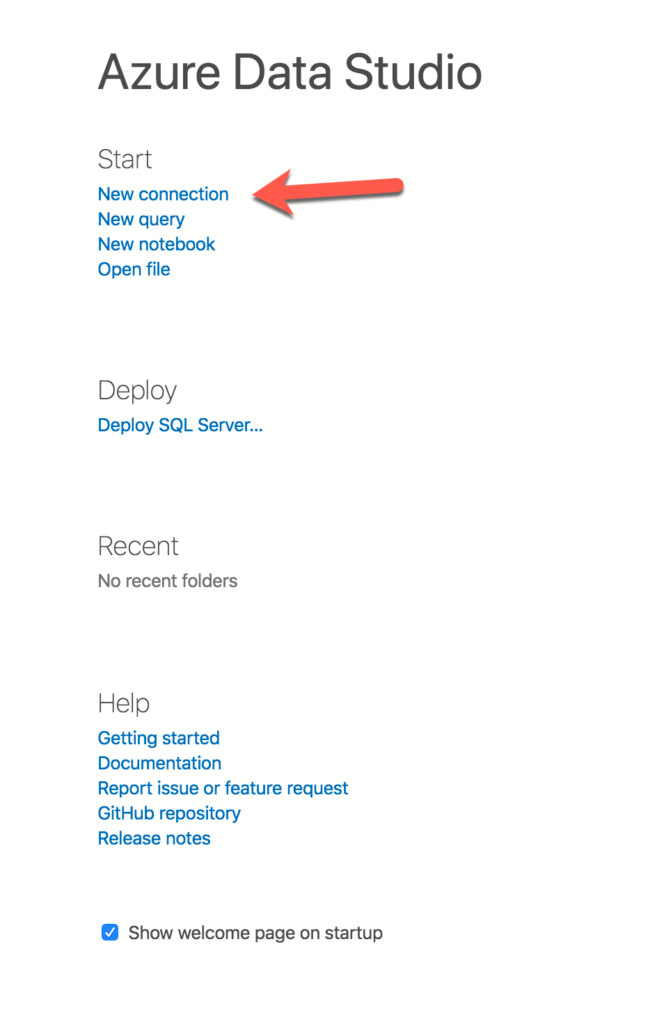
There are many tools to connect to the database, such as SQL Server Management, Visual Studio, Visual Studio Code, and Cloud Shell. In this article, you will download Azure Data Studio, which is a cross-platform IDE to manage Azure SQL databases. After installation is complete, select ‘New connection’.
The IDE opens a connection popup to type database info:

Clicking the ‘Connect’ button will connect to the empty database.
Connect your app to Azure SQL
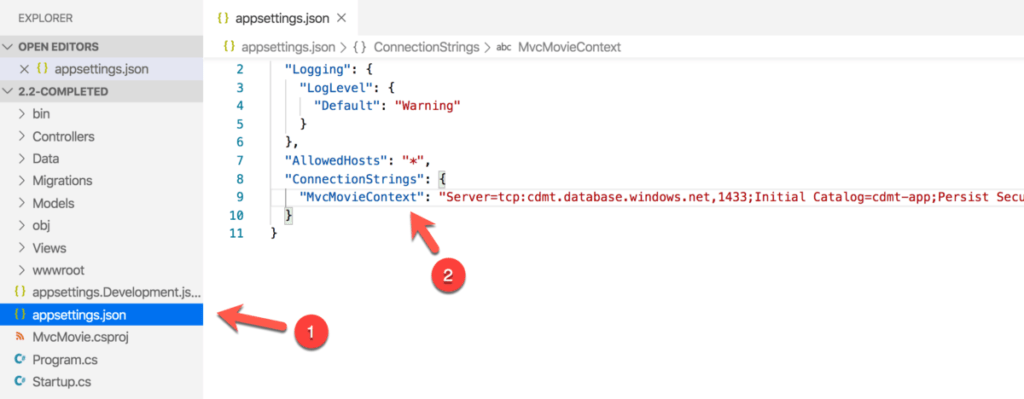
If you have SQL scripts available to create and seed your database, you can use Azure Data Studio to accomplish that, but for the purposes of this article, you can try to download a working ASP.NET MVC application that uses Entity Framework. Entity Framework (EF for short) is an O/RM that helps you to manage persistence for the domain of your application. The sample to download can be found here. Visual Studio Code can be used to open the application folder and restore packages or build the project, as in the last article. The first step is to replace the MvcMovieContext connection string in the appsettings.json file with the one available on the Azure SQL portal page.
Next, build and run the project using the .NET CLI to check if the connection is working (as explained in the previous article). If the connection is working, you should see some data on the movie page:
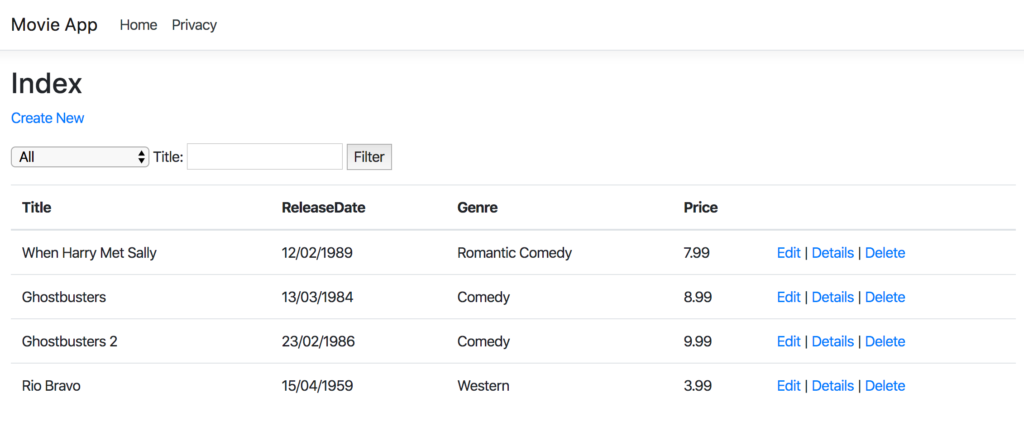
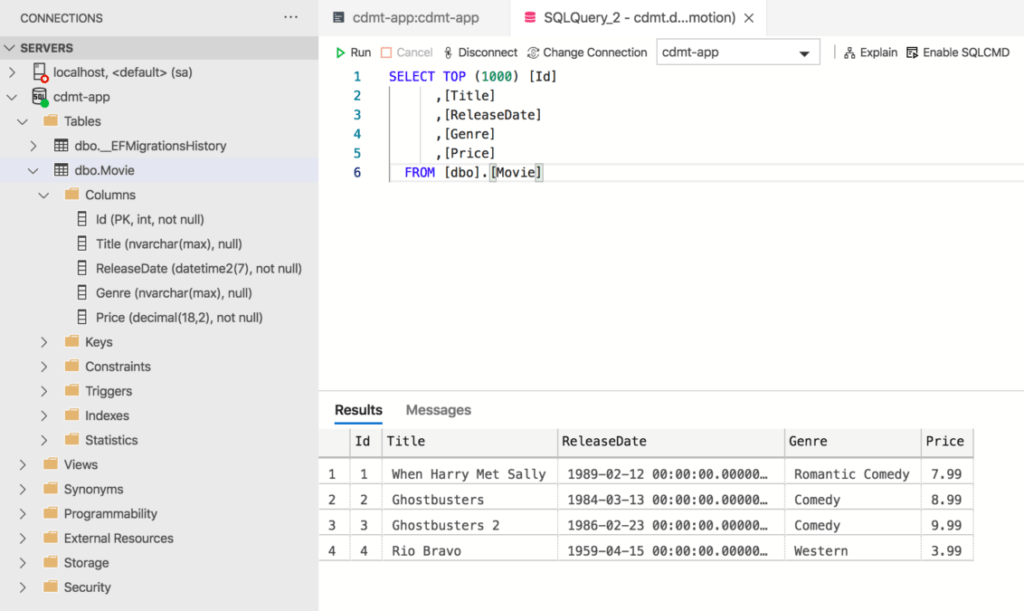
During the first execution, the Entity Framework will create and seed the database. Also, querying the Movie table in Azure Data Studio shows a few rows. Using this mechanism, named migrations, you can add more tables or data to the database.
Finally, you can deploy the app to an Azure Web App to test whether it connects to the Azure SQL database.
Recommended article: Will NoSQL Survive Big Data?


