IoT is a great opportunity for developers and smart home passionates, wanting to learn how to use electronics in a hands-on way. According to IoT enthusiast Orestes Carracedo: “If you’re a creative developer or a creative person you can do whatever you want to do with electronics. If you’ve never gotten started with electronics, there’s a bunch of kits that you can buy for Arduino and for other open hardware platforms. They are very, very cheap nowadays.”
Orestes Carracedo is the co-founder of Lighthorse Consulting and an enthusiastic IoT hacker. He’s also a consultant, speaker, mentor, and community lead and co-organiser of GDG Vigo and the VigoTech.org Community Cluster. At Codemotion Madrid last year he took a deep dive through all the pieces you’ll need to integrate your nifty gadgets with the Google Assistant.
He also provided a couple of great demos. This is a basic overview of the tutorial detailed in Orestes’ talk. For the full tutorial and discussion, take a look at the video below:
Understanding the Google Smart Home API
Google Home is structured in three main components:
- Google Home/Mobile Device – the surface to interact with the Assistant
- The Google Assistant – a conversation between you and Google that helps you get things done in your world
- Actions on Google – How developers can extend the ecosystem
In the following, we’ll try to understand how such components are used together to form the whole user experience we’re used to when chatting with Google Assistant.
Smart Home API: Standard devices and traits
How do you trust the user voice? How do you understand user voice? How do you extract intent? What do they want to do? So for that we have the Google Platform.

So the Smart Home API knows how about pretty much anything you can think of at the device. You have definitions for starting and stopping, turning on off, changing colour settings with different colour schemes, changing brightness, speed, etc. You can do pretty much whatever!
Home Graph
Smart Home Actions rely on Home Graph, a database that stores and provides contextual data about the home and its devices. The Home Graph database stores information about structures (for example, home or office), rooms (for example, bedroom or living room), and devices (for example speaker and light bulb). For example, Home Graph can store the concept of a home with a living room that contains multiple types of devices from different manufacturers such as a light, television, and speaker.
This information is available to Google Assistant in order to execute user requests based on the appropriate context. State data, such as if a light bulb is on, is not stored in the long term – it’s ephemeral and is only used in the Home Graph.
Home Graph is essentially a logical map of your home. It allows you to have a natural conversation with Google Assistant. If you are sitting in the den and you want to turn the den lights off, you would just say Hey Google, turn off the lights and would not mention the room that you are currently in.
Smart home provider UI components
The UI components available using this platform are two:
- User registration and authentication (based on Firebase)
- Device management, allowing you to add additional labels (e..g adding another door, adding another camera, etc.) This usually needs to be configured on a web interface
Voice User Interface platform for the Google Assistant
Let’s see how can we setup our Actions on a Google Project.
First, navigate to https://actions.google.com. From here, log in with your Google Account and then create new Actions on Google Project. Pick any project name you want. You can select any support language.
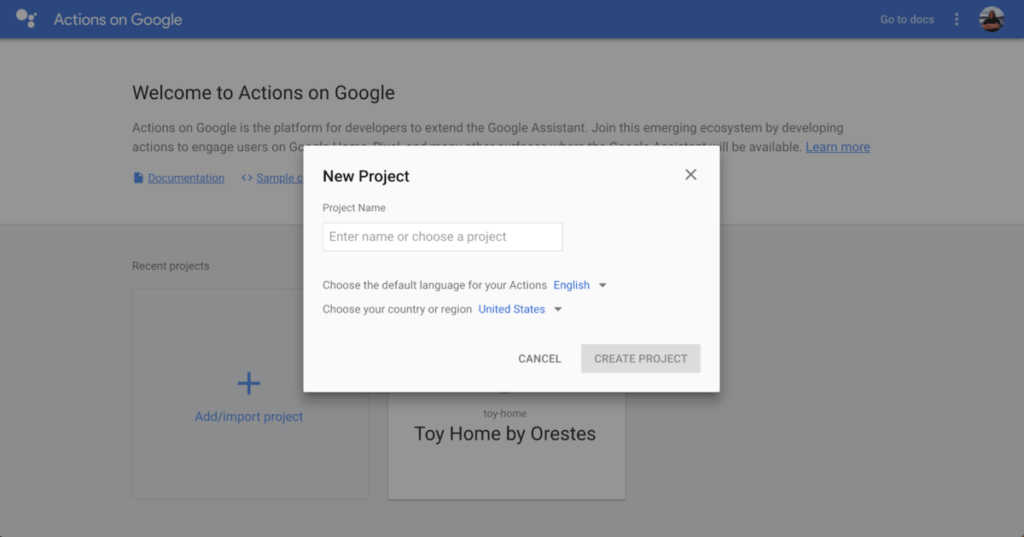
If you get the following screen, click on SKIP on the top right:
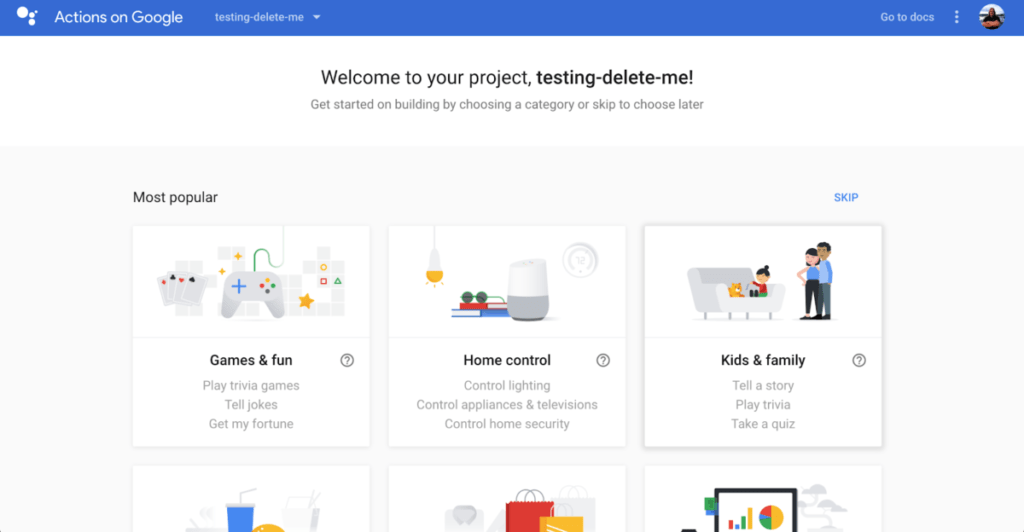
Make sure you pick the Smart Home template, shown below:
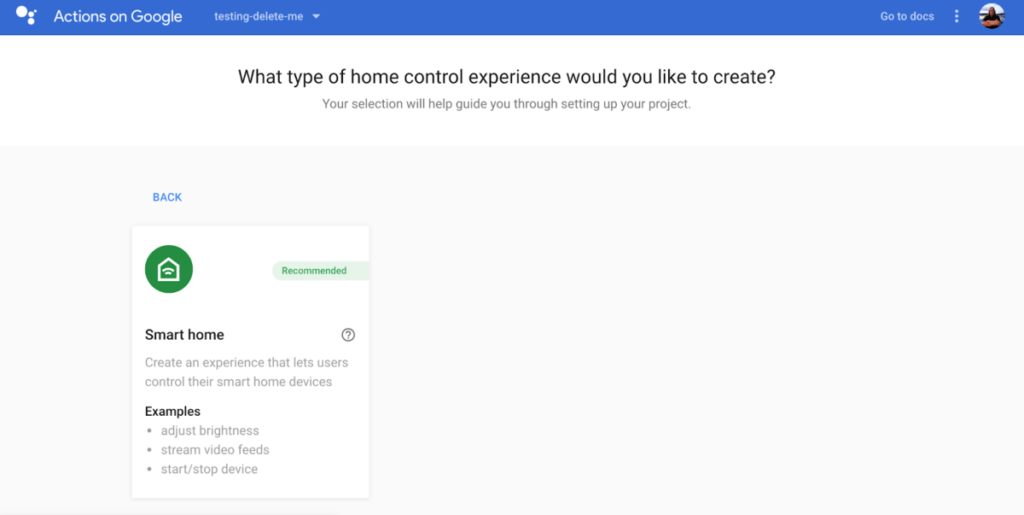
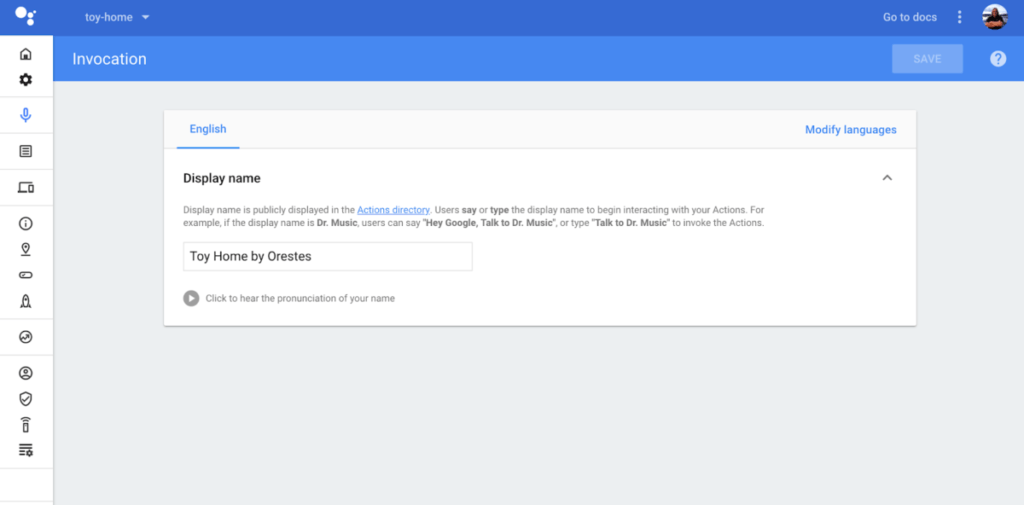
Pick a display name. This will be displayed in your list of Smart Home providers in the Google Home app.
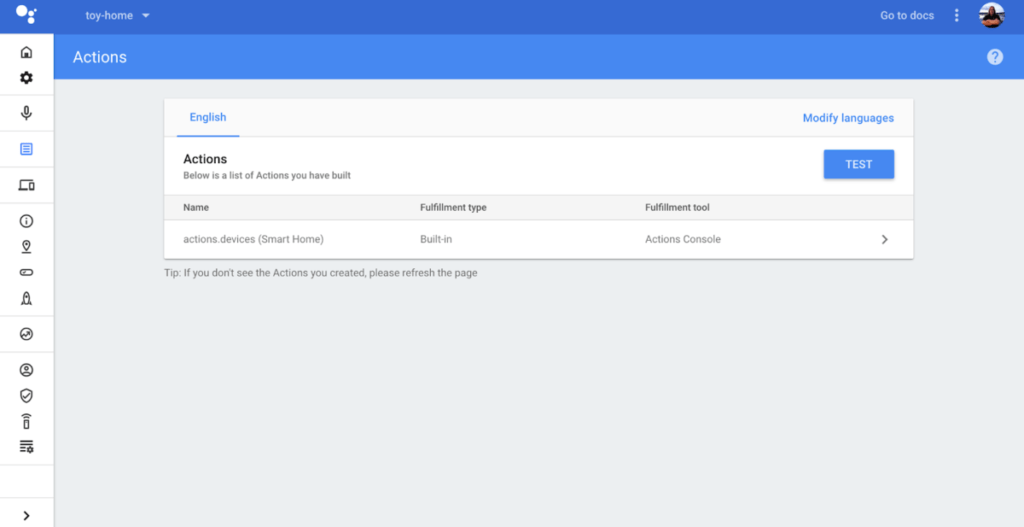
Go to the list of actions and click on the only action that shows on the list
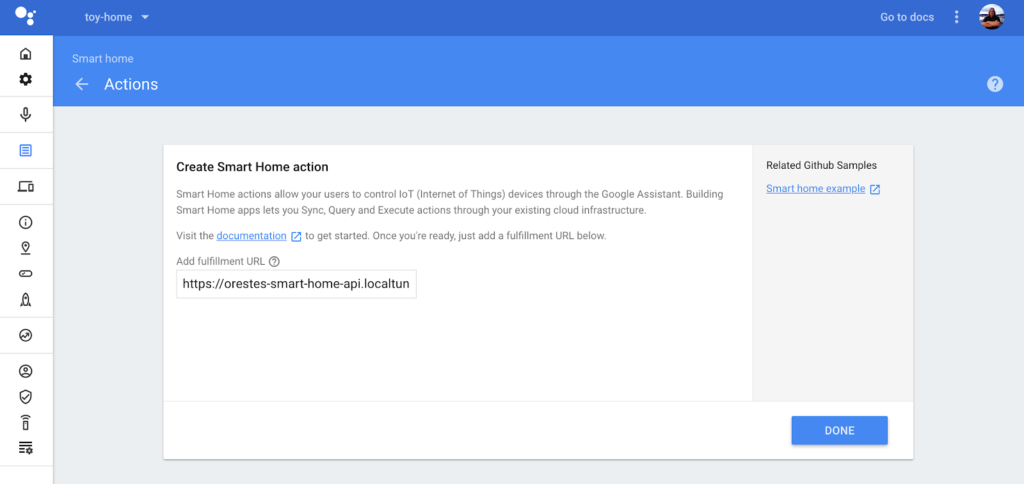
In the settings for the action, enter the endpoint URI for your request Firebase Cloud Function:
Now go the Advanced Options > Account Linking page and select the following options:
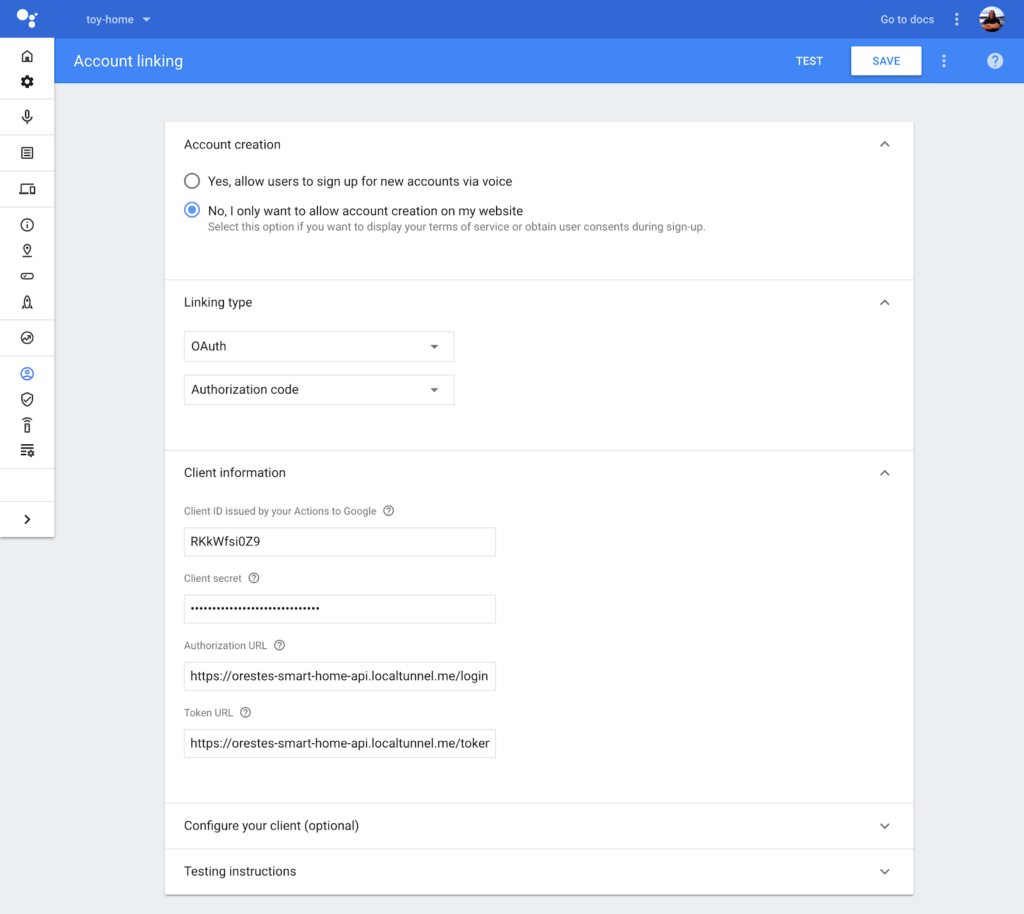
You can enter any client ID and client secret you want, while for the Authorization URL, use the URL that the Firebase Hosting provided you with Fore the Token
You’re done creating your smart home functionalities!
Now you can ask the Google Assistant to
- Turn on the light
- Turn off the light
- Set the light to green
- Set the light to 50%
You should see the logs in the Serial Monitor and your RGB light following your commands.
Looking for more IoT tutorials?
There’s a plethora of great IoT tools and tutorials available to get you started.
If you are interested, check out some of them in our Codemotion Magazine:
We also have our upcoming Codemotion Conference. We’ll gather all IT professionals with different backgrounds and levels of experience providing them with technical excellence, cutting-edge technologies as well as hands-on activities, best practices & case studies.
Want to launch a developer event despite the challenges of COVID-19?
If you want to know more about how modern technologies and tools can support you for – and during – the organisation of a virtual event, don’t miss this article showcasing the best tools we used to host our online conferences since the COVID-19 outbreak.


